


Stable Diffusion的工作流程(分步示例)是什么?
在本篇文章中,我将逐步介绍如何通过一系列步骤来创造出令人惊叹的Stable Diffusion艺术作品。这个流程包括:
- 构建基础提示词。
- 选择模型。
- 精细化提示词并生成具有良好构图的图像。
- 通过涂改修复缺陷。
- 放大图像。
- 使用照片编辑软件进行最终调整。
在这个工作流程中使用的软件是AUTOMATIC1111 GUI,因为它能够使用一些高级提示技巧并测试多个模型。
在后处理阶段,我将使用GIMP,这是一个免费的开源照片编辑器,用于进行小的最终调整。
构建基础提示词
首先是寻找大致匹配你想要的内容的提示词,包括两个方面:(1)主题和(2)风格。
应尽可能详细地描述主题,然后包括多个影响风格和美学的关键词。
例如,我想创建一个女性的数字插画。使用提示词生成器后,我得到了以下初始提示词:
A digital painting of [blake lively:Ana de Armas:0.8 ] , full-body, contemporary white top, red dress, by Artgerm, Guangjian, artstation, soft eyes, extremely detailed face, stunningly beautiful, highly detailed, sharp focus, radiant light rays
为了防范不良效果,还加入了标准的负面提示词:
ugly, disfigured, deformed, cropped
这只是一个草稿提示词,在工作流程中我们会对其进行修改。接下来,让我们进入下一步。
选择模型
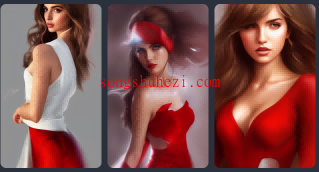
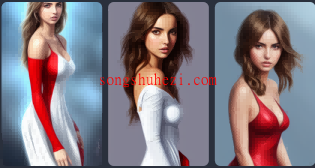
测试基础提示词也是选择模型的好时机。对于数字肖像,我会测试以下三个模型:
- Stable Diffusion 1.5:基础模型
- F222:专注于女性的模型(注意:这是一个NSFW模型)
- OpenJourney:MidJourney v4风格模型
我们会根据风格选择一个模型,不用担心得到一个完美的图像,稍后可以修复缺陷。
Stable Diffusion 1.5:基础模型
F222:专注于女性的模型(注意:这是一个NSFW模型)
OpenJourney:MidJourney v4风格模型
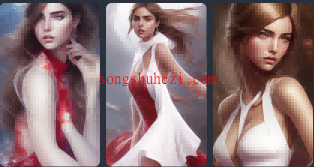
精细化提示词并获得良好构图
现在你已经选择了一个模型,让我们通过添加或删除关键词来精细化提示词,直到你得到一个可用于下一阶段的图像。
如提示词
A digital painting of [blake lively:Ana de Armas:0.8] in street cityscape background, happy, full-body, contemporary white top, red dress, (stocking:1.2), by Artgerm, Guangjian, artstation, soft eyes, extremely detailed face, stunningly beautiful, highly detailed, sharp focus, radiant light rays, cinematic lighting, colorful, volumetric light
反向提示词
ugly, disfigured, deformed, cropped
选择一个具有良好构图的图像,不必追求完美,稍后可以使用涂改来修复任何小缺陷。
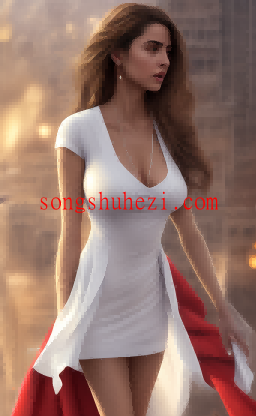
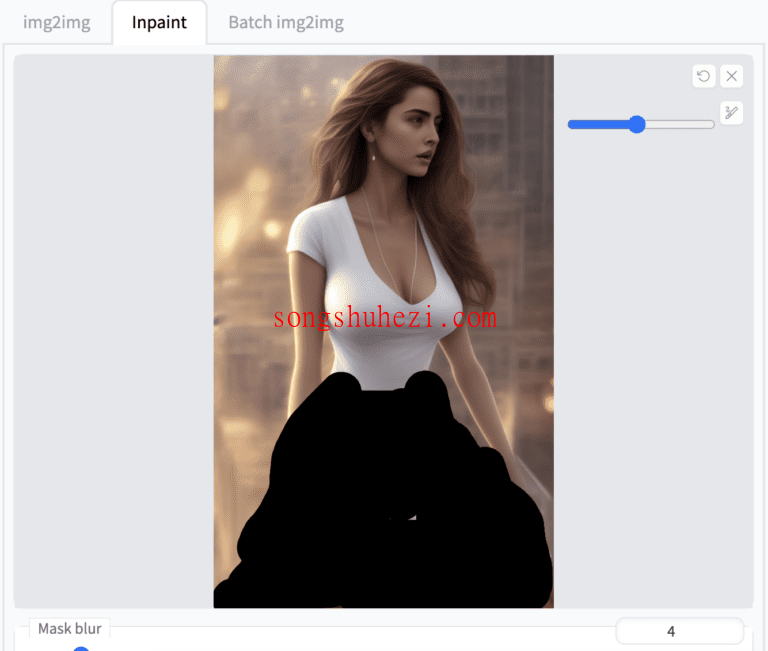
4. 通过涂改修复缺陷
如果图像的上半部分状况良好,但下半部分不够协调,可以使用涂改功能进行修复。
A digital painting of [blade lively:Ana de Armas:0.8 ] in street cityscape background, happy, full-body, contemporary top, (red dress: 1.3), (stocking:1.2), by Artgerm, Guangjian, artstation, soft eyes, extremely detailed face, stunningly beautiful, highly detailed, sharp focus, radiant light rays, cinematic lighting, colorful, volumetric light
最后生成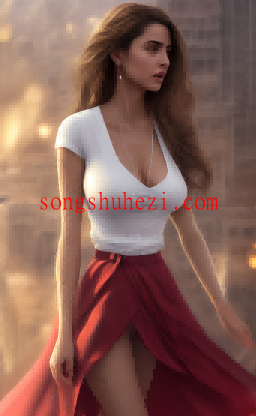
5. 放大图像
这个工作流程的一部分是将图像放大,因为它相当小,只有512×832像素。我们将使用AI放大器将其放大4倍。

经过一些实验,这是我确定的设置:
- 调整大小:4
- 升级器:R-ESRGAN 4x+
- CodeFormer 可见性:~0.5
- CodeFormer 权重:~0.5
- 恢复面前高档:是
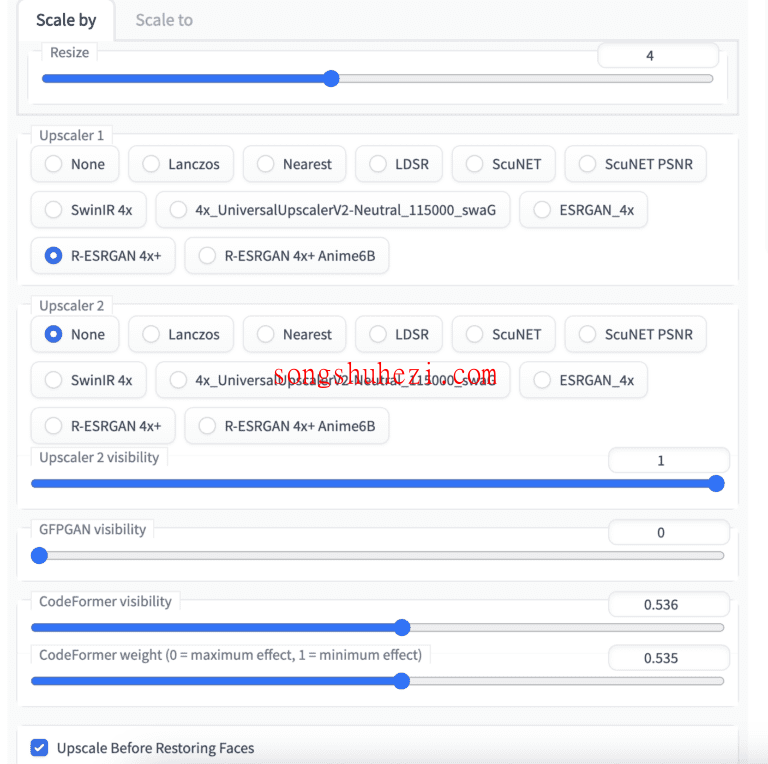
一般规则是应用尽可能少的面部修复量。这可以通过降低CodeFomer 可见性和/或增加CodeFormer 权重来实现。 **在恢复面部之前进行升级
**可以减少升级器引入的伪影。
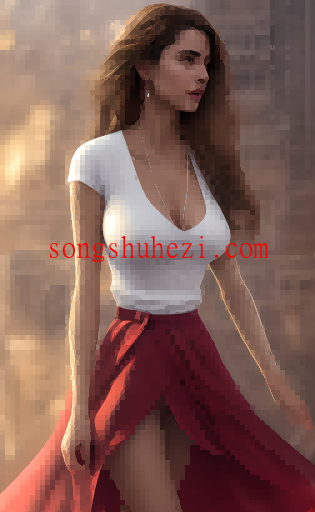
这是升级后的图像:
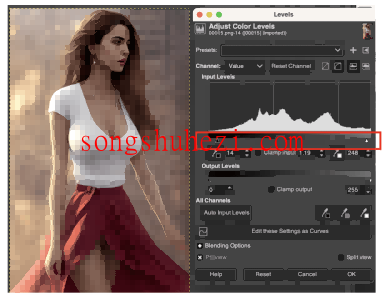
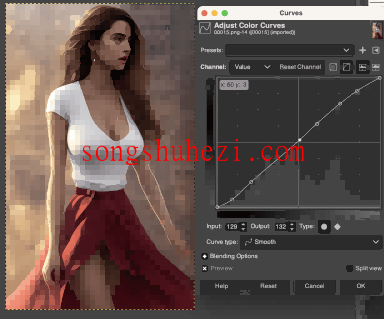
6. 最终调整
最后一步是使用GIMP或任何你选择的照片编辑软件进行一些亮度和对比度的小调整。这里只介绍了一些非常基础的调整方法:层次、曲线和裁剪。
通过上述步骤,我们可以获得最终结果,一个经过精心制作的Stable Diffusion艺术作品。

反爬虫抓取,人机验证,请输入验证码查看内容
请关注本站公众号回复关键字:“2024”,获取验证码。
微信搜索公众号:“AI绘画教程网”或者“aihuihua404” 或微信扫描上方二维码关注微信公众号


 RSS
RSS